Monday, April 12, 2010

Sweet Potato Rolls!


I know I have been bad about updating lately, but I have actually been busy rather than lazy. Well, mostly busy - out of town, lab work, running a beer mile. I have still been making a ton of bread, though, so I have some backlogged pictures and thoughts on the way.

Until I get around to actually writing a post, I thought I'd give you all a nice recipe I found on The Fresh Loaf. I made these last Thanksgiving, and they are delicious. Every time we get sweet potatoes in our CSA box, I claim them for this slightly sweet and totally awesome bread. I usually microwave the sweet potatoes in saran wrap after poking some holes in them with a fork, it's much faster than actually baking them.

Sweet Potato Rolls

I'll try to get some pics up soon too, unfortunately I have not spent much time documenting my bread, only eating it.

Saturday, February 20, 2010

Bread stuffed with meat and cheese?

Oh Adam. You are so lucky. I made you pane ripiene (stuffed bread) for Valentine's Day. I used the recipe here (it's one of the links on the side). Rather than follow any of the recipes found on the recipe page, however, I decided to fill my bread with spicy Italian sausages, mozzerella cheese, peppers, and onions. Adam sauteed up the peppers, onions, and a jalapeno, as well as the sausage.


I made the dough according to the recipe, but I needed to add a bit of extra flour, and I used 1 1/4 tsp instant yeast added to the dry ingredients. After rising, I stretched the dough out into a rough rectangular shape and filled it first with slices of cheese, then the onion, pepper, and sausage mixture. I used the "book" shaping method, which I've never tried before but which I quite enjoyed.
 

To make the book, you fold up the bottom and top about 2 inches, then the two sides into the center, almost touching. Then you fill it up with another layer of meat and cheese and fold the left side over the right, like closing a book. I tried to seal the book shut along the "pages" but I definitely put a little too much filling in there. If this were a real book, the spine would be facing you in this picture.
I stretched the bread a little bit too thin in a few areas and it wouldn't quite seal shut. I should have used about 75% of what I ended up putting in there, which I realized at the time but a weird stubbornness about using all the filling took over. As you can see, I also ripped a little bit of a hole in it trying to seal it shut. It didn't matter though. It was still delicious.

It's a nice, versatile dough. I could see filling it with pretty much anything you want - veggies and cheese, coldcuts and cheese, pizza toppings, feta and olives, etc. I will definitely be making it again. The only word of advice I have is to make sure you get toppings in the corners of your book, or else the ends are mostly bread. My book ended up with a really nice crunchy brown crust. The leftovers also heated up very nicely the next day.

Friday, February 19, 2010

Epi dos and don'ts

So making bread is pretty easy. Throw 4 basic ingredients together, ferment, shape, bake. And that works great, unless you end up where I have, which is wanting to learn how to do all this crazy shaping for no real reason, other than to boast "Hey! Look what I made!" I mean, no one eating my bread cares if I just make a regular loaf, or a baguette, or a sheaf of wheat (epi). Except for me. I care, if only so I can pat myself on the back more than I already do, which is getting pretty exhausting as it is :)

But it is so worth it when a beautiful piece of bread comes out of the oven and you realize that it has happened. You have learned the trick to shape it j-u-s-t right. It is so satisfying, just like when you pull your film out of the developer and your protein bands are right there, right where they should be! But so much more delicious! Oh, science.

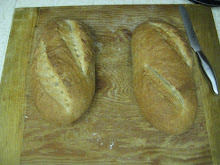
The recipe I used for this is a variation on pain de campagne (country bread) from the BBA (where else?), but I added a considerable amount of rye flour. This dough is very pliable and easy to shape, and if you want to learn how to make different shapes I recommend starting with this type of formula. The recipe can be found here, all the way at the bottom, if you want to make this bread but don't own BBA (honestly, if you want to make this bread, you really should own it anyway so you can see how to make all the shapes)


I made it with the pate fermentee, and I also used more like 1 1/4 -1/2 cups bread four and 3/4 cup rye flour (specifically, 4 oz rye and 5 5/8 oz bread flour) in the dough. This makes it stickier and a little more difficult to handle, but I like the heartier flavor with more rye flour. You can also use whole wheat if you prefer.


The first step to making an epi is to shape the bread into a baguette. This skill alone took me around 6 batches of bread until I understood the oft-written phrase "a baker must have an iron fist in a velvet glove." You have to be firm and gentle. You have to let the dough relax if it starts to tear or if it is too elastic, and you can't get impatient with it. They key is to get good surface tension on the outside of the dough, effectively enclosing it in its own skin.

First, pre-roll the dough into loose rounds, then turn them upside down and try to make a more oblong shape, with the longer dimension going horizontally in front of you. The way I do it is to try to fold the dough in on itself in the middle, then alternately roll it against the surface to lengthen, very similar to rolling Play-Doh into long snakes. I usually do this twice, with a 5 minute dough rest in between. Otherwise, the dough is too elastic and either shrinks in length, or the outer "skin" necessary for good tension rips. It is definitely a skill that requires practice. Also, you can't be too rough with it, or all the air that has accumulated during the first rise will be pressed out. Its ok if they seem a little thin, if you shaped them right they should rise and get puffy. You want to make sure you roll the seam together and put it on the bottom of your loaf as it rises. I like to seam it up the side, the roll the loaf onto itself to close the seam and place it on the bottom.

The next step to making an epi is to cut the baguette with scissors to spread the "wheat grains" out on your parchment paper or Silpat. This is where my inattention to detail became obvious to me. It clearly says in BBA (and my other reference book, Bread by Jeffrey Hamelman) to allow the dough, shaped into a baguette, to rise. Just before putting it into the oven, cut the wheat grains. I, however, simply assumed it needed to happen immediately after shaping. Perhaps this is because the first time I made epis was Superbowl Sunday and I had partaken of the half keg upstairs without restraint, then the second time I assumed I already knew what I was doing (oops).

The second time I cut two before I reread the instructions to learn that, in fact, you must cut them after the proofing stage. The side by side comparison coming up makes it clear to me that this results in a far superior loaf of bread.
You want to cut your baguette almost parallel to your surface with scissors (clean them! don't be gross) as close to the bottom as possible. Try to leave just a tiny bit at the bottom attached. Splay the wheat grains out to alternate sides.
On the parchment is the loaf I cut before proofing, on the Silpat is the loaf I cut right before the oven.
The epi on the left was cut pre-proofing, the one on the right was cut post-proofing. See how pointy and elegant the one on the right is, compared to its less defined, more bulbous sibling? How much more oven spring it got? Following the directions really DOES make things turn out better! I figured out epis!

Sunday, February 14, 2010

Happy Valentine's Day!


Last year, Adam made me a heart-shaped pizza (delicious). This year, I made him a loaf of bread filled with Italian sausage, mozzerella, and peppers. Pictures soon to come.

Wednesday, February 10, 2010

Getting Back in the Breadmaking Vibe

I have been lazy with my bread lately. There was the lab trip to Las Vegas (a weekend where I not only didn't make bread, but where Adam stayed home and ate the loaf buffer I had stored in the freezer). Plus, I was sick, and LOST started again which has taken up a lot of my brain space. Then there was the whole "science experiments" thing I try to get done now and again. That can be a real time suck. But what I lack in bread, I more than make up for in photo ops.

Here I am, damn excited about some oysters in Las Vegas.


I guess what I am saying is that I know I have been bad lately. I know this because there are not 4 extra backup loaves of bread in the freezer anymore. But I am back on the straight and narrow. I made some sweet epis for the Superbowl (but I was too drunk to take pics - oops - there will be more where those came from). This, however, is the best lab photo EVER, and so my bread hiatus was well worth it!

Bagels - so close to perfection!!


I made Natalie cinnamon raisin bagels for Xmas, and she "made" me engagement photos (soon to be up on the adam-and-angela wedding info blog, btw) so I used the opportunity to continue working on my bagel formula. I made two batches of 6, because the formula for the cinnamon raisin requires more yeast (cinnamon inhibits yeast growth) and sugar to add sweetness. The other batch was my usual, the favorite, the everything bagel (yum). I will include the formula for the basic bagel, and add the notes for the cinnamon raisin variant at the end.

The base for this formula is Bagels II, but I weighed out my ingredients this time and substituted malt syrup for sugar in the dough AND for honey in the poaching liquid. I found the malt syrup at Whole Foods. These bagels were very close to what I am looking for in terms of texture, but the dough didn't have the depth of flavor that would have made them perfect. Next time, I think I will combine Peter Reinhart's method of overnight retarding (not in a refrigerator storing the New Year's Eve champagne on NYE this time) and this formula. If that is the long-sought bagel recipe that makes the perfect bagel, I will certainly let you know.

Here is my formula for 6 bagels, and the procedure I used for this batch:
  • 3 cups/483g bread flour
  • 1 1/2 tsp instant yeast
  • 1 1/2 tsp salt
  • 1/2 tbsp/ 6g vegetable oil
  • 1 tbsp/16g malt syrup
  • 1 cup/245g water (lukewarm)
For cinnamon raisin:
  • Add an additional 3/4 tsp instant yeast
  • 2 1/2 tbsp/ 39g turbinado sugar
  • 1 1/2 tsp cinnamon
  • 1 cup loosely packed raisins (rinsed in warm water)
I mixed the bread flour and salt in a bowl, then added the yeast to the water, the oil and the malt syrup (honey is a fair substitute). Then I combined all of these ingredients and mixed them into a ball (since the dough is so stiff, it seemed necessary to hydrate the yeast before dispersing it in the dough).  I kneaded the dough for around 15 minutes, adding about 1/2 of a cup of flour in the kneading process. Bagels take a lot of kneading. Knead until you start to sweat, then knead for about 5 more minutes. The dough will be just right. It should be very stiff but not tear when you knead it. Add a trickle or two of water if it tears until you can remedy this situation.


For cinnamon raisin, add the cinnamon and sugar to the dry ingredients. Once the dough ball has formed, knead the raisins in evenly. It will be difficult and seem like WAY too many raisins, but remember that the dough will rise around the raisins.

I made the dough and let it rise for about an hour at room temperature. Then, I shaped the bagels by cutting the dough into 6 pieces, rolling them into balls, poking a hole in the middle and working them into a solid bagel shape like this. I boiled them in our largest pot, filled 2/3 with water and a tablespoon of malt syrup. I boiled them 2 minutes a side, 3 at a time. They should get puffy when you boil them (not flat like my previous bagel attempt).


After I boiled them, I topped the everything bagels and baked them and the cinnamon raisin bagels in a 500F oven on the baking stone for about 25 minutes. I cooked them around 2 minutes too long, because while the bagels themselves were good, my "everything" on top was a bit scorched. The cinnamon raisin bagels came out great.

Next time, I will use cooler water on the bagels, and shape them after 30 minutes of bulk fermentation and let them retard in the fridge until the next day. The next try might be the ones, the bagel perfection I have been chasing!

Monday, January 25, 2010

Ciabatta phone home...

I made some more spent grain bread (loaves this time) and a batch of ciabatta last weekend. Ciabatta can be fun to make because it is so oddly shaped, and I found most of the shaping instructions pretty strange. Apparently, ciabatta means slipper, which I do find kind of weird and slightly unappealing, despite my love of both food and shoes. This is my second attempt at ciabatta, which is not too difficult to make.  It is another bread that requires no kneading, just a lot of intense mixing and then folding of really wet dough. This is again out of BBA - I swear one of these days I'll make some bread from a different book. I think next time I will increase the hydration percentage to get more of the giant holes in the crumb. The dough was fairly easy for me to work with using the formula from the book.

One thing I don't have are baker's linens. When I need to prop things up for a rise (like ciabatta or baguettes) I improvise with parchment paper and a bunch of Adam's old shirts underneath to help support the bread while it rises. It looks weird, but it does the trick.


Ciabatta is also cool because right before you bake it, you stretch it out into the "slipper" shape. I haven't come across any other breads that are handled this way right before going in the oven. Usually, you want to be very gentle after proofing so the bread doesn't deflate, but these loaves have enough oven spring to handle it. Those are some giant slippers.


Then, as the bread was cooling innocently on the counter, Adam noticed that we weren't alone.


Once you see the E.T. hiding in the bread, it is impossible to unsee him. It is perhaps the creepiest baked item I have ever made, though I have had some pretty bizarre things made for me (Erin, I'm looking at you). He stared at us all night, and I considered sacrificing him in the name of eating fresh bread, but I felt bad. He had no arms or legs, no way of defending himself. A few days later, though, without a thought, I came home sort of hammered and toasted him with some butter. Compared to his twin loaf, however, I think he had it pretty good. That loaf didn't even get a story.


 Ciabatta RIP 1/16/10 - 1/22/2010